


Step-by-Step Guide to Setting Up Your Creality Printer
If you’ve recently decided to dive into the wonderful world of 3D printing, congratulations! Whether it’s for hobby projects, prototype development, or simply for the joy of creating, having a 3D printer at home opens up a realm of possibilities. Among the various models out there, Creality printers have earned their spot as a favorite for both beginners and experienced users alike. In this guide, we’ll walk you through the steps of setting up your Creality printer and getting started on your first print.
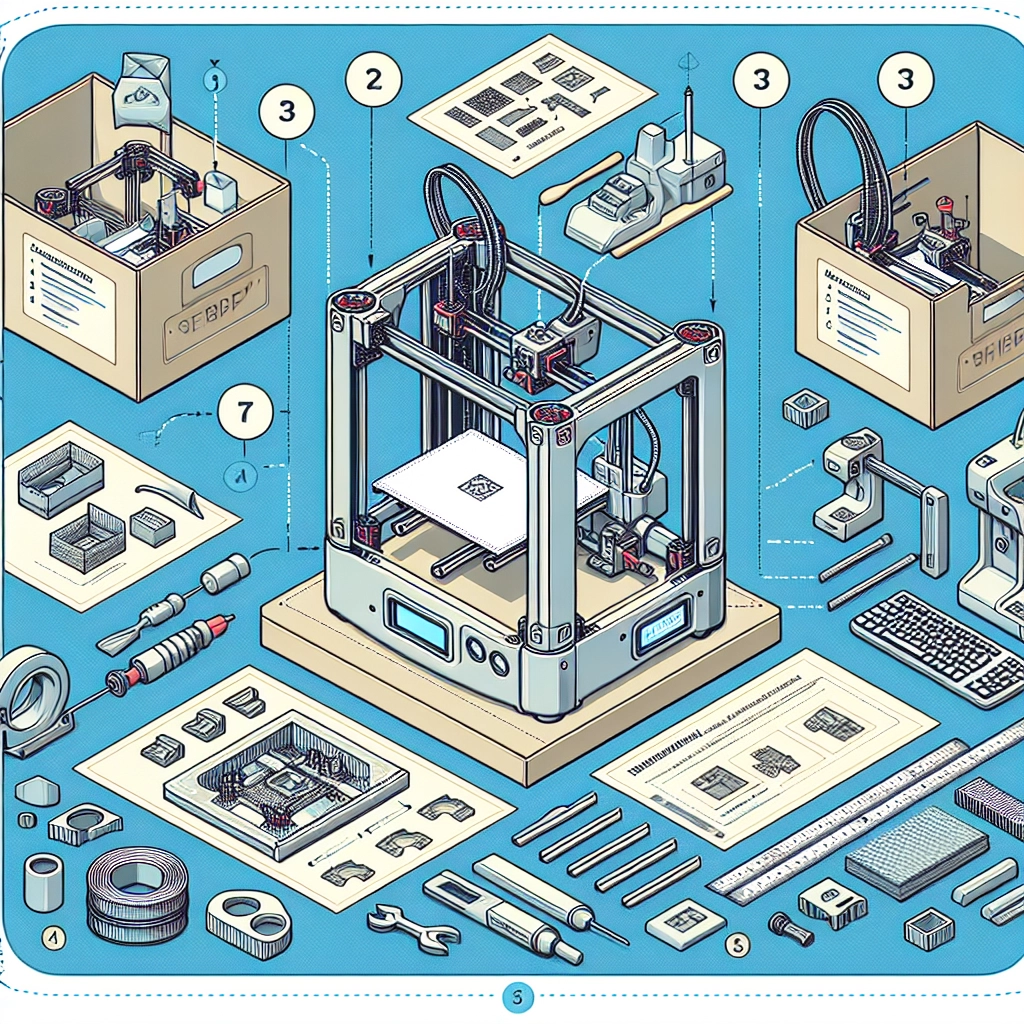
Step 1: Gather Your Supplies
Before you jump into assembly, make sure you have everything you need at hand. Typically, your Creality printer package will include:
- The printer itself (usually comes in a semi-assembled state)
- Power supply
- Tools for assembly (such as wrenches and screwdrivers)
- Spool of filament (some models include a starter filament roll)
- SD card (with preloaded files, if available)
- User manual
Take a moment to check off everything; a missed item can lead to unnecessary frustration later!
Step 2: Assemble the Printer
Follow the instructions in the user manual closely, as each model may differ slightly in assembly. Here’s a general rundown of what to expect:
-
Frame Assembly: Start by putting together the main frame of your printer. You’ll typically connect the vertical and horizontal beams using the provided screws. Be sure to use the correct screws – a mix-up can lead to stability issues later on.
-
Attach the Gantry: The gantry is the moving part of the printer that holds the print head. Secure it to the frame according to the manual, ensuring it can move freely without obstruction.
-
Install the Build Plate: This is where your magic happens! Secure the build plate to the printer base. Check that it’s level and adjust it if necessary. A level build plate is critical for the first layer adhesion later on.
-
Wiring: Connect the wiring harnesses as directed. This part can seem intimidating, but follow the colors and labels, and you’ll be just fine. Make sure connections are snug for optimal performance.
Step 3: Bed Leveling
This step might seem tedious, but bed leveling is crucial for successful prints. Many Creality printers feature a manual leveling system or a guided auto-leveling feature. Here’s how to do it manually:
- Heat up the nozzle and build plate to working temperature.
- Using a piece of paper, slide it under the nozzle. Adjust the bed height until you feel slight resistance when moving the paper.
- Repeat the process for all corners of the build plate.
Invest some time here; it’ll save you countless hours of troubleshooting later!
Step 4: Load Filament
Now that your printer is assembled and leveled, it’s time to load the filament!
- Heat up the nozzle to the recommended temperature for your filament type (usually around 200°C for PLA).
- Insert the filament into the extruder and gently push it until you see it coming out of the nozzle.
- Once it’s flowing smoothly, you’re all set!
Step 5: Load and Prepare Your Print
With your printer ready, let’s prepare for that first print.
-
SD Card: If your printer came with an SD card, insert it into your computer and check if any sample files are present. If not, you can easily download 3D models from sites like Thingiverse or MyMiniFactory.
-
Slicing: Use slicing software (such as Cura or Creality’s slicer) to convert your 3D model file into a language the printer understands (G-code). Adjust settings like layer height, fill density, and print speed according to your project needs.
-
Start Printing: Save the sliced file to your SD card, insert it back into the printer, and select the file via the onboard menu. Sit back, relax, and watch as your vision comes to life!
Step 6: Monitor Your Print
This is an exciting moment! Keep an eye on your print, especially if you’re new to 3D printing. Check for issues like warping or layer separation. Fortunately, Creality printers often come equipped with features that help minimize these common problems.
As your first print nears completion, anticipate that thrilling moment when it’s finally done. It’s like unwrapping a gift you’ve uniquely shaped with your creativity!
Navigating the setup of a Creality printer might seem daunting at first, but once you get the hang of it, it’s incredibly rewarding. Embrace the learning curve. Whether you’re making small tweaks or improving your printing technique, every project helps you grow as a maker. So fire up that printer, unleash your creativity, and let the fun of 3D printing begin!