


How to Create Custom Filaments for Your 3D Printer
The world of 3D printing is an exciting arena filled with endless creative possibilities. While many of us are familiar with the common filaments like PLA, ABS, and PETG, perhaps you’ve often wondered if you could take things a step further. Imagine designing a filament that perfectly meets your needs—whether it’s a specific color, unique texture, or enhanced strength. If you’re ready to dive into the realm of custom filaments, let’s unravel how you can embark on this crafty journey.
Understanding the Basics
Before you start your filament-making adventure, it’s helpful to understand what goes into the making of 3D printing filaments. Most commonly, 3D printing filaments are made from thermoplastics that soften when heated and solidify upon cooling. The most popular filament types include:
- PLA (Polylactic Acid): Biodegradable and user-friendly.
- ABS (Acrylonitrile Butadiene Styrene): Strong and durable but has issues with warping.
- PETG (Polyethylene Terephthalate Glycol): A balance between ease of printing and strength.
When creating custom filaments, you’ll essentially be manipulating these thermoplastics, mixing different materials, or adding unique additives to achieve custom formulations.
Step 1: Gather Your Materials
The first step involves sourcing the right materials. Here’s what you’ll need:
- Base Filament: Start with a basic filament like PLA or ABS as your foundation.
- Additives: These could include colorants, scent infusions, or materials like carbon fiber or metal powder for improved strength or aesthetic appeal.
- Additive Mixing: If you’re looking to develop unique properties—like flexible or even glow-in-the-dark filaments—grab compatible materials to blend in.
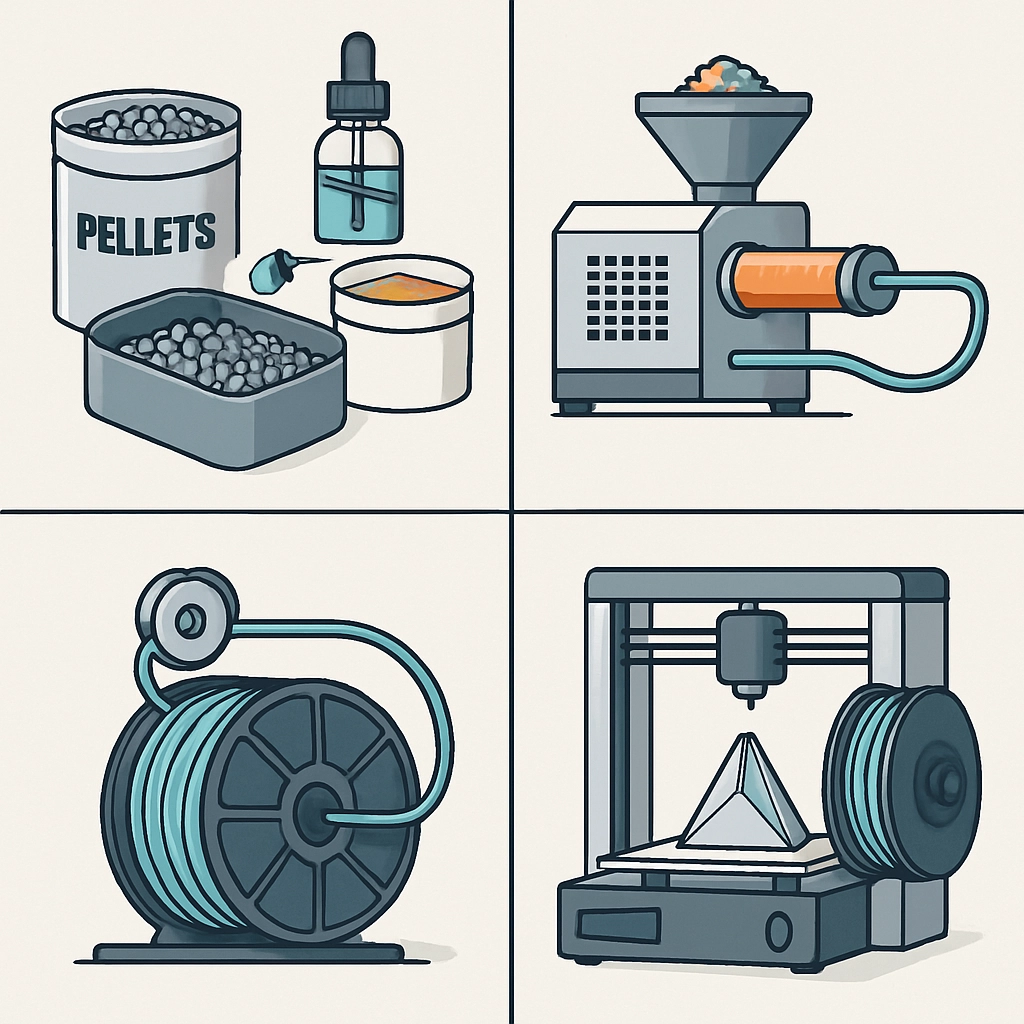
Step 2: Equipment for Custom Filament Production
To create filaments from scratch, you’ll need a few tools:
- Filament Extruder: This device melts the plastic and forms it into filament. There are many DIY options available, or you can purchase commercial-grade extruders.
- Cooling and Winding Equipment: This will allow you to cool and spool your filament neatly for storage and later use.
Some enthusiasts even create their own filament-producing setups using parts sourced from local hardware stores.
Step 3: Melting and Mixing
Once you have your base materials, start mixing!
-
Measure Out Your Materials: Use a precise scale to measure your base filament and any additives you plan to incorporate. It’s essential to keep track of the ratios to replicate your successful runs later on.
-
Heat Up the Extruder: Follow the manufacturer’s guidelines for heating your extruder. For example, PLA generally melts at around 180°C, while ABS requires around 230°C.
-
Mix and Pour: Feed your mixture into the extruder and watch as it transforms. This can take a little while, so take the time to enjoy the process!
Step 4: Cooling and Spooling
After you’ve successfully extruded your filament, the next task is cooling it down properly. This is crucial in obtaining quality filament, as improper cooling can lead to warps or inconsistencies:
- Utilize a cooling fan or water bath to help solidify the filament.
- Set up a spooler to keep the filament tangle-free for seamless printing later.
Step 5: Filament Testing
Before diving into a full project with your new custom filament, it’s crucial to test its capabilities. Print a small object—something straightforward works best. Take notes on how it behaves during printing. Consider:
- How does it adhere to the print bed?
- What temperature works best for quality prints?
- Are there any unexpected results or issues?
Tweaking the filament composition might take a few tries. Don’t be discouraged by a few hiccups along the way—it’s all part of the learning curve!
Fun Ideas for Custom Filaments
Now that you’re well-versed in the basics, let’s think creatively! You could:
- Create multicolor filaments to produce fascinating patterns in your prints.
- Experiment with scented filaments, adding essential oils for unique aromatherapy creations.
- Craft flexible or rubber-like filaments for functional designs.
As you delve into the exciting world of custom filaments, the potential applications are virtually limitless. Your journey could not only enhance your 3D printing experience but also unlock a door to creating unique, one-of-a-kind pieces that cater to your specific projects. Embrace your creativity and enjoy making those custom filaments!