


How to Design and Print Your First 3D Model
Have you ever dreamt of bringing your ideas to life in three dimensions? If so, you’re in luck! 3D printing has become increasingly accessible, allowing hobbyists and creators alike to make their own models, prototypes, and even artistic projects. With a bit of guidance, anyone can start their journey into the fascinating world of 3D modeling and printing. So whether you’re looking to create a custom figurine, a unique gift, or just want to explore the technology, let’s dive into how you can design and print your very first 3D model.
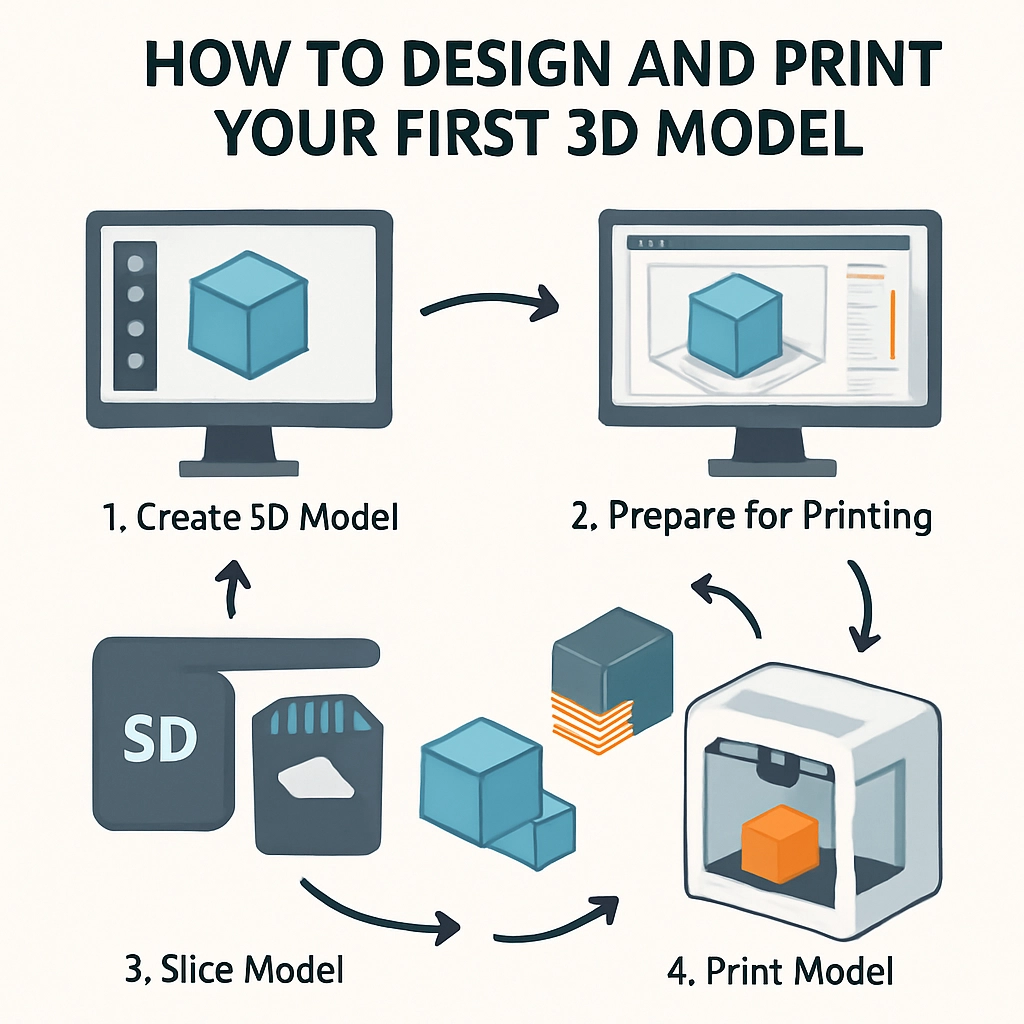
Step 1: Getting Started with 3D Design Software
First things first—before you can create something physical, you need to design it digitally. There are many software options available for 3D modeling, ranging from beginner-friendly to professional-grade. Here are a few noteworthy choices:
-
Tinkercad: This is an excellent platform for beginners. It’s user-friendly, web-based, and requires no downloads. Tinkercad allows you to build models by combining basic geometric shapes, making it easy to grasp the fundamentals.
-
Blender: For those looking to explore more complex modeling, Blender is a powerful and free option. It has a steeper learning curve but is fantastic for creating intricate designs when you feel ready to take on more challenges.
-
Fusion 360: If you’re interested in engineering and mechanical designs, Autodesk’s Fusion 360 offers advanced modeling tools and is free for educational use. It’s great for creating precise models that may need to fit together or function mechanically.
To get started, choose a software that matches your skill level and spend some time tinkering with its features. Most platforms offer tutorials and community support, so don’t hesitate to seek help when needed!
Step 2: Designing Your Model
Once you’ve selected your software, it’s time to unleash your creativity! Here are some tips for designing your first model:
-
Start Simple: As a beginner, it’s best to keep your first project manageable. Try creating something like a keychain, a simple geometric shape, or a small decorative item.
-
Keep the Dimensions in Mind: Before you get too deep into your design, remember the size limits of your printer. Most home 3D printers have a print volume of around 8 x 8 x 8 inches, so design with that in mind.
-
Export the Model: Once you’re satisfied with your creation, remember to export your model in a format suited for 3D printing, typically an STL or OBJ file.
Step 3: Finding the Right 3D Printer
If you don’t have your own 3D printer yet, that’s totally fine! You have a few options for printing your model:
-
Local Maker Spaces: Many cities have community maker spaces equipped with 3D printers and staff who can help you out. This is a great way to learn without committing to a purchase just yet.
-
Online 3D Printing Services: Websites like Shapeways or Sculpteo allow you to upload your design, choose materials, and have your model printed and shipped to you. It’s super simple!
-
Investing in a Printer: If you see 3D printing becoming a regular hobby, it might be worth investing in your own printer. There are plenty of affordable options available, such as the Creality Ender 3 or Prusa Mini, which are both beginner-friendly.
Step 4: Preparing for Printing
Before you can hit “print,” there are a few preparation steps:
-
Slicing the Model: To prepare your model for 3D printing, you’ll need to use slicing software (like Ultimaker Cura). This software converts your 3D model into a language that the printer can understand, generating instructions that guide the printer in creating the object layer by layer.
-
Select Your Material: Depending on the type of printer, you may have various filament options like PLA (easy to print and environmentally friendly), ABS (stronger but requires more adjustments), or PETG (a good balance of strength and flexibility).
Step 5: Printing Your Model
With everything in place, it’s time to print! Load the filament into your printer, adjust the settings from your slicing software, and press print. It might take anywhere from a few minutes to several hours, depending on the complexity of your model.
Keep an eye on the process—especially your first time! Being present will help you learn about the technology and troubleshoot any hiccups that might arise.
Bring Your Ideas to Life
3D printing combines creativity and technology seamlessly, opening a world of possibilities. After seeing your first printed model come to fruition, you might find yourself flooded with new ideas and projects. The journey into 3D modeling is not just about the end result, but also about the learning experience, the creative process, and the satisfaction of bringing your imagination into reality. So, gather your materials, pick your software, and dive into the world of 3D creation! You’ll be amazed at what you can achieve.