


Beginner’s Guide to Slicing Software: Making Your 3D Prints Perfect
If you’re venturing into the exciting world of 3D printing, you’re probably buzzing with enthusiasm to create something amazing. But before you can watch your printer in action, there’s an essential step that can’t be overlooked: slicing your 3D model. Think of slicing software as the translator that turns your 3D design into a language your printer can understand. This guide will walk you through the basics of slicing software so that you can achieve beautiful, high-quality prints.
What is Slicing Software?
At its core, slicing software takes your 3D model—usually in STL or OBJ format—and converts it into instructions for your 3D printer. These instructions are called G-code, which is a series of commands that tell the printer exactly how to create the object layer by layer. Every detail, from temperature settings to the speed of movement, is encoded in this language. So, in essence, slicing software is the behind-the-scenes magic that makes your 3D prints a reality.
Choosing the Right Slicing Software
Before diving into the slicing process, you need the right tool. There are numerous slicing programs available, each with its own strengths and quirks. Some popular choices include:
-
Ultimaker Cura: User-friendly and widely adopted, this open-source software is perfect for beginners. It offers preset profiles for various printers and materials, making it easy to get started.
-
PrusaSlicer: Designed for Prusa printers, this powerful tool can also be used with other models. It offers rich features and supports advanced configuration, so you can tweak the settings as you progress.
-
Simplify3D: A paid option, it comes with more advanced features and customization capabilities. It’s aimed at users who desire a bit more control over the printing process.
As a beginner, starting with a simple and intuitive slicer like Cura or PrusaSlicer can help you get your toes wet without feeling overwhelmed.
Importing Your Model
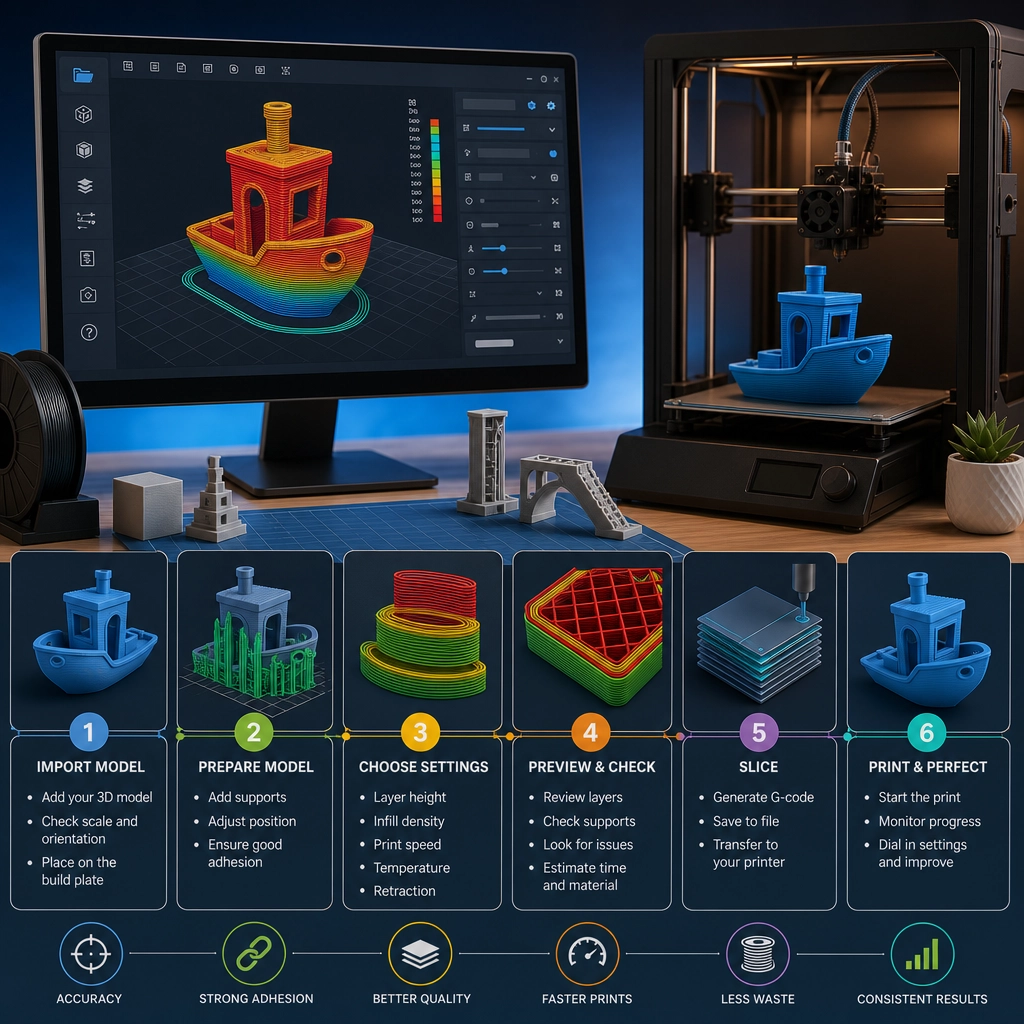
Now that you’ve selected a slicing tool, it’s time to import your 3D model. Most slicing software provides a straightforward way to upload your file, often by dragging it directly into the workspace. Once imported, you may see an option to adjust the orientation of your model. For best results, ensure it’s laying flat on the bed in a position that minimizes supports and wastage.
Configuring Print Settings
Here’s where the slicing magic happens! You’ll need to set some parameters to optimize your print. Here’s a breakdown of essential settings you should consider:
-
Layer Height: This determines the print’s resolution. A lower layer height (like 0.1mm) will give you finer detail but will take longer to print. Conversely, a higher layer height (like 0.3mm) speeds up printing but sacrifices some detail.
-
Print Speed: This controls how fast the printer moves. While faster speeds can lead to quicker prints, they may also increase the chance of errors or poor adhesion. A common speed for beginners is around 50-60 mm/s.
-
Infill Density: The infill is the internal structure of your print. A higher infill percentage (50% or more) results in greater strength but uses more material and takes longer. For decorative prints, 10-20% infill is often sufficient.
-
Supports: If your model has overhangs, you may need to add supports. Choosing the right type (like grid or tree supports) can affect the ease of removal and surface finish of your print.
-
Temperature Settings: Each material has a specific temperature range for optimal printing. Make sure to set the nozzle temperature according to the filament you’re using.
Previewing the Slice
Before launching your print, give your model a quick preview in the slicer. Most software provides a way to see a simulation of how the printer will build the model layer by layer. This step is crucial as it lets you spot potential issues, like holes or unexpected supports that might affect your print quality.
Saving and Printing
Once you’re satisfied with your settings and preview, the last step is exporting the G-code file to your printer. You can usually save it to a microSD card or send it directly to the printer if you have a compatible setup.
Remember to keep an eye on the initial layers of your print—this is where many issues arise. A strong first layer is essential for adhesion and overall success.
As you embark on your 3D printing journey, the slicing software may seem overwhelming at first, but with practice, it will become second nature. Experimenting with different settings will help you learn what works best for your specific projects. Every print is an opportunity to improve your skills and gain insights into the fascinating world of 3D printing. So, dust off that printer, slice away, and let your creativity take flight!