How to Optimize Your 3D Printer Settings
So, you’ve got your shiny new 3D printer, and you’re ready to unleash your creativity. But hold on! Before you dive headfirst into the world of printing, it’s essential to optimize your printer settings. Not only will it help improve print quality, but it can also save you time, filament, and frustration. Let’s explore some practical tips to help you get the most out of your 3D printing experience.
Understand Your 3D Printer
First things first, take some time to familiarize yourself with your specific model. Every 3D printer has unique specifications and capabilities. Check the manufacturer’s website for guidelines on recommended settings, and don’t forget to read the user manual! It may not be the most riveting read, but it’s full of useful gems.
Material Matters
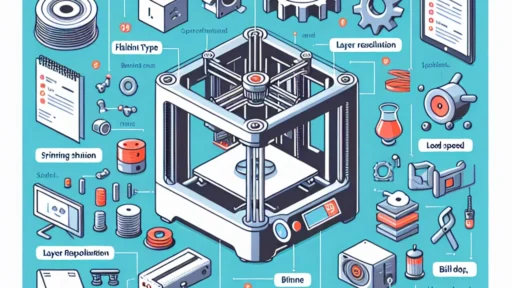
Choosing the right filament is a crucial step in getting great prints. Different materials require different settings. For instance, PLA is generally easy to work with and has a lower melting temperature, making it forgiving for beginners. On the other hand, ABS might need a heated bed and controlled cooling to prevent warping. Each material will have its specific settings, so be sure to adjust your temperature, speed, and other parameters accordingly.
Temperature
Getting the right nozzle and bed temperature can make a world of difference. Start with the manufacturer-recommended temperatures for the material you’re using. From there, you can experiment by adjusting upwards or downwards a few degrees. Keep an eye on the print; if you notice issues like stringing, that can indicate your nozzle temperature is too high.
Bed Adhesion
Getting your first layer right is essential for a successful print. Bed adhesion issues can cause prints to warp or lift off the print bed. Consider using a heated bed or applying adhesives like glue stick or blue painter’s tape to your print surface. The goal is to create a nice grip during that crucial first layer while still allowing for easy removal when the print job is done.
Layer Height and Print Speed
Balancing layer height and print speed can transform your prints, too. Thinner layers (0.1 mm to 0.2 mm) can create more detailed prints but will take longer, naturally. If speed is your priority, try thicker layers (0.3 mm and above), but be aware that you may sacrifice some detail. A speed of 40-60 mm/s is a good starting point, but feel free to tinker with this as you gain experience.
Cooling Settings
Cooling affects print quality, particularly for intricate designs. PLA, in particular, benefits from additional cooling once the first few layers are printed. Most slicer software allows you to set rules for cooling fans, so once you’ve established a solid foundation with the first layer, you can kick into high gear with the cooling!
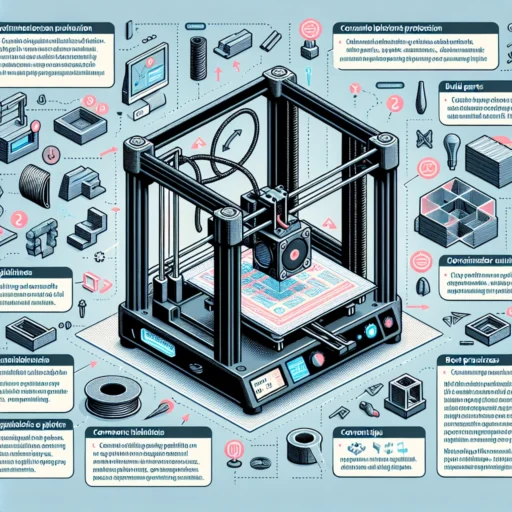
Slicing Software: Your Best Friend
Did you know that the right slicing software can help you achieve optimal results? Depending on your printer, you might use well-known options like Cura, PrusaSlicer, or MatterControl. These allow you to tweak tons of settings from layer height to print speeds. Spend a bit of time exploring the features and interfaces, and don’t hesitate to watch online tutorials to guide you through advanced functionalities.
Test, Test, Test
Ah, the age-old adage in the world of printing: "Try, adjust, try again.” Don’t be afraid to run test prints to find that sweet spot for your particular setup. High-quality prints often emerge from iterative testing and tweaking. Designs like calibration cubes or temperature towers can help you assess print quality and necessary adjustments effectively.
Monitor Your Progress
As you dive into the realm of 3D printing, keep a log of your settings and the outcomes. Note what worked and what didn’t, allowing you to build a reference guide that suits your specific needs. You’ll be surprised how much you learn simply by keeping track of your successes and failures over time.
Engage with the Community
Never underestimate the power of online forums, Facebook groups, and Reddit threads. The 3D printing community is vast and full of knowledge. Don’t hesitate to ask questions or share your experiences; chances are someone else has encountered (and solved) the same problems you’re facing.
In the world of 3D printing, optimization isn’t just a one-off task; it’s a continuous journey. With a little patience and experimentation, you’ll not only improve your skills but also enjoy the process. Each tweak and adjustment brings you closer to the perfect print, and that moment of watching your ideas come to life is genuinely rewarding. So happy printing—your next masterpiece is just a few settings away!