

Setting Up Your 3D Printer: A Step-by-Step Guide
So, you’ve finally decided to leap into the exciting world of 3D printing! Whether you’re dreaming of printing custom figurines, creating functional prototypes, or exploring the depths of your creativity, setting up your 3D printer is the first step on this exhilarating journey. With so many models available, the setup process can vary a bit, but fear not! I’m here to guide you through a straightforward process that will have you printing in no time.
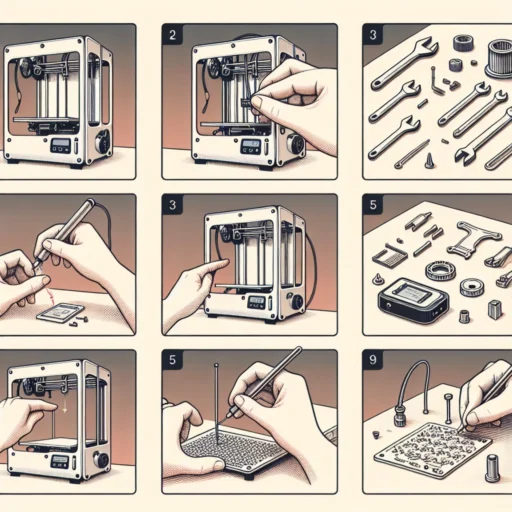
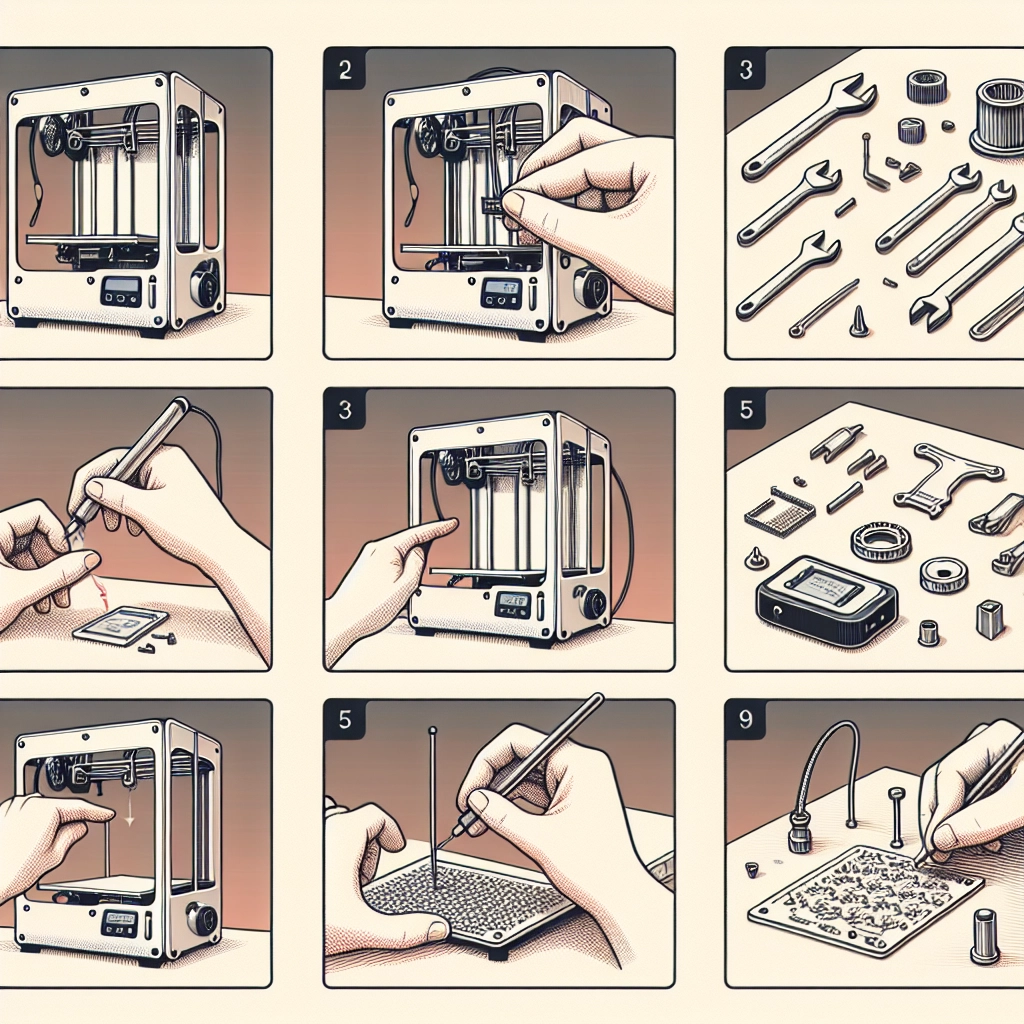
Gather Your Tools and Supplies
Before you dive into the setup, let’s make sure you have everything you need. Most of these tools are things you might already have lying around the house:
- 3D Printer: Obviously!
- Filament: Common choices include PLA and ABS.
- Power cable: Comes with most printers.
- USB cable: If your printer connects to a computer.
- Leveling tool: Some printers come with their own; if not, a piece of paper will do.
- Screwdriver: Depending on your model.
Once you’ve rounded up your gear, find a well-ventilated area to set up your printer. Ideally, this should be a flat, sturdy surface with enough room for the printer and some storage for tools and materials.
Step 1: Unboxing Your Printer
Unboxing may sound simple, but pay close attention. Take your time and inspect everything as you go. Some manufacturers include small parts that are easy to overlook! Carefully remove the printer from the box and the protective packaging. Make sure to keep any screws, cables, and other accessories together and note any user manuals. Some printers even provide a handy assembly guide—don’t throw that away!
Step 2: Assembling the Printer
Depending on your printer model, you might have to assemble various parts like the frame, the build plate, or the extruder. Follow the instruction manual closely during this part to avoid any confusion. If you’ve bought a pre-assembled printer, doge this step and focus on wiring instead.
If your assembly includes bolting parts together, ensure everything is securely tightened but avoid over-torquing—this could damage the parts.
Step 3: Connecting Power and Setting Up Wiring
Connect the power supply to your printer and plug it in. Check for any visible cable management guides in your manual—nothing looks worse than tangled wires! The often overlooked part is ensuring that your wiring is organized and neat to prevent any accidents during operation.
If your printer uses a USB connection, plug it into your computer if that’s how you intend to send print files. Otherwise, if you’re using an SD card or a built-in Wi-Fi, ensure you’re ready on that front too.
Step 4: Leveling the Build Plate
The holy grail of 3D printing is definitely a properly leveled build plate. If your printer doesn’t have an auto-leveling feature, you’ll want to do this manually. Start by preheating the nozzle, then place a piece of paper between the nozzle and the build plate. Adjust the leveling knobs until you feel slight friction on the paper as you pull it out. Take your time, this step is crucial for the success of your prints!
Step 5: Loading Filament
Now that you have the build plate set up, it’s time to load your filament. Before doing this, make sure your nozzle is heated to the appropriate temperature based on the filament type. You’ll simply insert the filament into the extruder until it grips, and watch for that first luscious flow of melted plastic.
Step 6: Calibration Prints
Once everything is ready and set, it’s time to test your printer with a calibration print! Download a simple calibration model like a cube or a calibration test. This will let you check for issues like layer adhesion, print quality, and dimensional accuracy. Observe how the printer performs, take notes, and make adjustments as needed.
Final Thoughts
Setting up a 3D printer can feel a bit daunting at first, but once you break it down into steps, it becomes much more manageable. Every printer has its quirks, and with a little patience and practice, you’ll become a pro in no time!
Remember to join online forums or local maker spaces where you can ask questions and share experiences with fellow enthusiasts. The 3D printing community is vibrant and incredibly helpful. Now, roll up those sleeves, unleash your imagination, and enjoy making amazing 3D creations! Happy printing!


