Setting Up Your Bambu Lab 3D Printer: Step-by-Step Guide
If you’ve recently acquired a Bambu Lab 3D printer, congratulations! You’re about to step into a world brimming with creativity and innovation. Whether you’re a seasoned maker or just diving into the fabulous world of 3D printing, setting up your printer can feel a bit daunting at first. But fear not! This step-by-step guide will have you up and running in no time, and soon enough, you’ll be printing out everything from nifty gadgets to stunning art pieces. Let’s roll up our sleeves and get started!
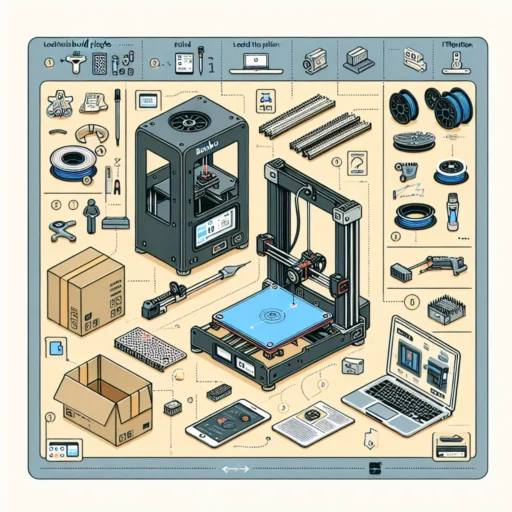
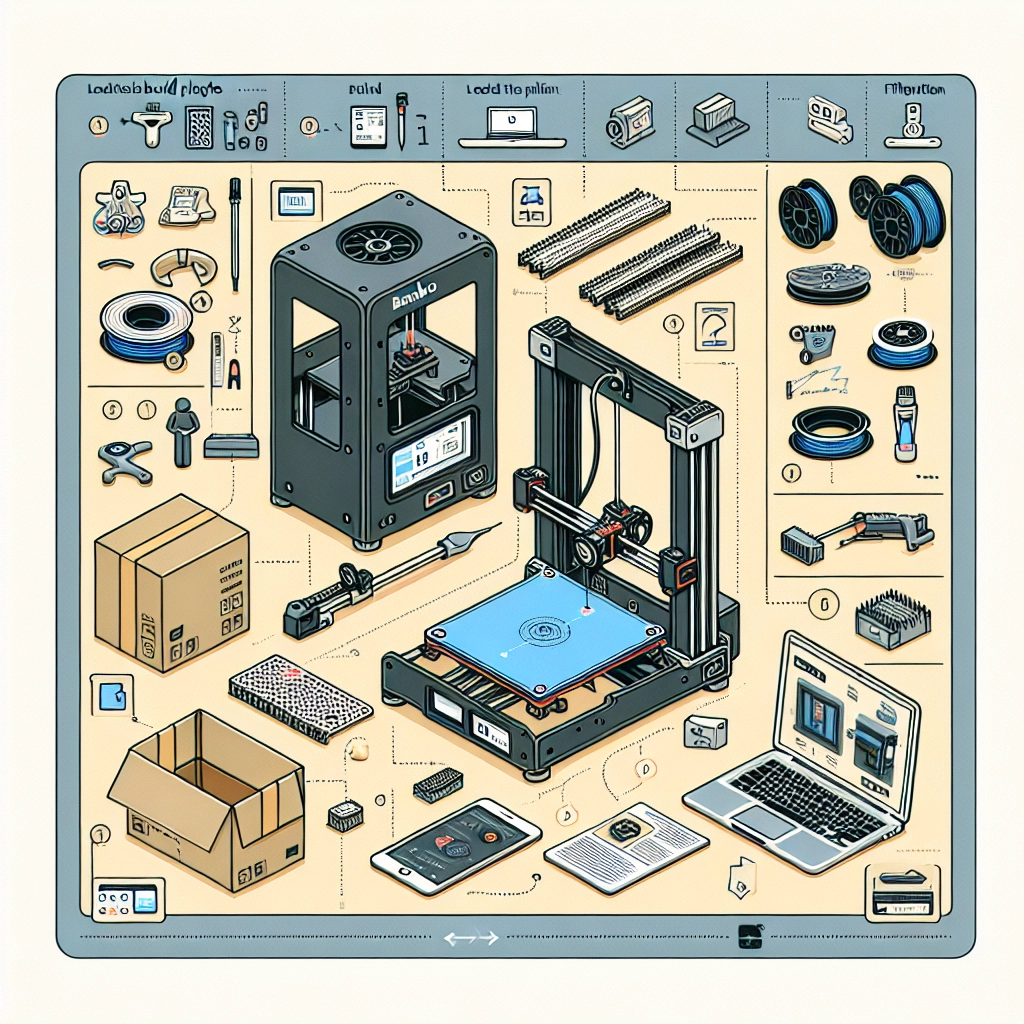
Unboxing Your Bambu Lab 3D Printer
First things first, let’s safely unbox your new gadget. Find a spacious area where you can work without feeling cramped. Remove the printer from its packaging, being cautious not to damage any components. You should find:
- The printer itself
- Power supply and cables
- Filament spool holder
- User manual
- A few tools for assembly like a screwdriver, and a few spare screws
Take a moment to inspect everything and ensure nothing is damaged or missing. Once you’re certain that everything is in good shape, we can get started.
Assembling the Printer
Step 1: Attach the Filament Holder
The first task is to attach the filament spool holder. This will go either on the side or rear of the printer, depending on your model. Usually, the holder will click into place, so make sure it’s secure.
Step 2: Set Up the Build Plate
Next, you’ll want to prepare the build plate. Most Bambu Lab printers come with a heated bed, which can help in achieving better adhesion for your prints. Clean the build surface with isopropyl alcohol to remove any oils or dust. Once it’s dry, level the bed, which typically involves adjusting some screws until the nozzle is the right distance away from the surface.
Step 3: Connect the Hardware
Now it’s time to connect the hardware. Plug in the power supply and any cables needed for the control panel and other components. Ensure all connections are secure but don’t overly tighten them, as you could damage the connectors.
Step 4: Load the Filament
Loading the filament is one of the most exciting parts! Make sure you’re using the right filament for your printer model. Typical options include PLA, ABS, and PETG. To load, heat the nozzle to the appropriate temperature for your filament type, which you can find in the manual. Once heated, gently insert the filament into the extrusion system until you feel resistance, signaling that the filament has reached the nozzle. Let it extrude a little to ensure it’s flowing smoothly.
Initial Setup and Calibration
Step 5: Turn On Your Printer
With everything connected, it’s time to turn on your printer. You should see the control panel light up. Navigate through the setup process on the touchscreen, which will guide you through initializing the printer.
Step 6: Calibrate the Axis
A crucial step in ensuring your prints are perfect is calibrating the axis. Follow the prompts on the control panel to move the print head and bed to their respective home positions. This might involve some tweaking, so be patient.
Step 7: Conduct a Test Print
Now that your printer is calibrated, it’s a good idea to perform a test print. Most Bambu Lab printers come with pre-loaded test files. Select one from the menu, load it up, and watch the magic happen!
Software Setup
Step 8: Install the Necessary Software
Alongside your printer, you’ll need to install the Bambu Studio software on your computer. This software is your gateway to creating and slicing models for printing. Import STL or OBJ files, check scale and settings, and slice the model for printing. Don’t forget to explore all the settings to optimize for speed and quality.
Step 9: Connect to Wi-Fi
If your printer has Wi-Fi capabilities, connecting it to your home network can streamline the printing process. Follow the instructions in the manual for connecting to Wi-Fi, allowing you to easily send print jobs directly from your computer or mobile device.
Final Touches
Step 10: Fine-Tuning Settings
After successfully printing your first model, take the time to fine-tune your printer settings. Adjust speed, temperature, and other parameters based on your material and specific project. This might take some trial and error, but the results will be worth it.
There you have it—a straightforward setup for your Bambu Lab 3D printer! Now that everything is ready, the only thing left to do is let your creativity shine. Embrace the learning curve, experiment, and don’t hesitate to join online communities for tips, tricks, and inspiration. The world of 3D printing is vast, and you’re just getting started! Happy printing!