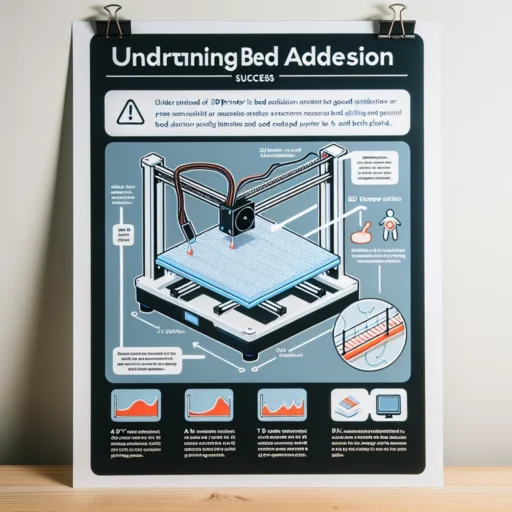

Understanding Bed Adhesion: Tips for 3D Printing Success
In the exciting world of 3D printing, one of the most critical elements often overlooked by newcomers is bed adhesion. Ask any seasoned 3D printer, and they’ll tell you that getting that first layer to stick properly can make or break your print job. Whether you’re a hobbyist or diving into professional projects, mastering bed adhesion can save you time, material, and a lot of frustration. So, let’s dive into what bed adhesion is, why it’s important, and some handy tips to achieve 3D printing success!
What is Bed Adhesion?
At its core, bed adhesion refers to how well the first layer of your 3D print sticks to the build plate (or print bed). The quality of this bond is crucial for several reasons: without adequate adhesion, your print may warp, detach, or misalign as the nozzle continues to lay down layers. Think of it like the foundation of a house; if it’s not solid, everything built on top of it is at risk.
Why Does Bed Adhesion Matter?
-
Quality Prints: Proper bed adhesion ensures each layer sticks to the one below it, creating a smoother and more precise final product.
-
Reduced Wastage: When prints fail due to poor adhesion, you’re not just losing time—you’re wasting filament as well. That’s money down the drain!
-
Time Efficiency: Successful prints from the get-go mean less time spent troubleshooting and fixing issues, allowing you to focus on the creative side of 3D printing.
-
Mitigating Warping and Separation: Certain materials are prone to warping as they cool. Strong bed adhesion helps keep these materials in place throughout the printing process.
Tips for Achieving Great Bed Adhesion
1. Level the Build Plate
One of the first steps in ensuring good bed adhesion is leveling your print bed. An unleveled surface can lead to uneven distances between the nozzle and build plate, causing adhesion issues. To check leveling, use the paper test: slide a piece of paper between the nozzle and the bed; it should have a slight resistance. Many printers come with auto-leveling features, so check if yours does!
2. Choose the Right Surface
Different materials require different bed surfaces for optimal adhesion. Glass plates offer a smooth finish and work well with materials like PLA. Meanwhile, textured surfaces may enhance grip for filaments like ABS. Experiment with various surfaces to find out what works best for your specific material.
3. Temperature Matters
The temperature of your print bed is critical. Many filaments have recommended bed temperatures, typically printed on their packaging. A heated bed helps maintain adhesion, especially with materials prone to warping. For example, ABS often requires a bed temperature of around 100-110°C. A quick consult with your filament manufacturer’s guidelines can save you a lot of headaches later on!
4. Use Adhesives Wisely
When in doubt, a little adhesive can go a long way. Spraying a light layer of hairspray, applying glue stick, or using specialized 3D print adhesives can enhance adhesion for tricky filaments. Just make sure to clean the bed regularly to avoid excess buildup.
5. First Layer Settings
Don’t underestimate the power of your first layer settings! Slowing down the print speed for the initial layers can give the filament a bit more time to stick. For many printers, setting the first layer speed to about 20%-50% of the normal speed can work wonders. Just remember: patience is key.
6. Adjust Extrusion Multiplier
Sometimes, more material is what you need for strong adhesion. Consider increasing your extrusion multiplier, which ensures that enough filament is deposited on your first layer. Generally, a slight increase (around 1.1 to 1.2) can enhance that foundational layer without affecting the rest of the print.
7. A Clean Bed is a Happy Bed
Finally, always ensure your build plate is clean. Dust, grease, and leftover adhesive can create gaps and prevent your material from bonding well. A quick wipe down with isopropyl alcohol can refresh your surface and improve adhesion.
Wrapping It Up
Bed adhesion might sound like a simple concept, but mastering it is a game changer in 3D printing. With just a little attention to detail, like leveling your bed, experimenting with surfaces, and fine-tuning your printer settings, you can set yourself up for successful prints time and time again. The feeling of seeing your project come to life, with every layer secured in place, is incredibly rewarding. So, roll up your sleeves, put these tips into practice, and watch your 3D printing skills soar!