

How to Optimize Your 3D Printer Settings for Perfect Prints
3D printing has taken the world by storm, transforming how we create and manufacture objects. Whether you’re a hobbyist tinkering away on weekends or diving into professional projects, achieving the perfect print can often feel like trying to hit a moving target. The good news? Fine-tuning your 3D printer settings is the key to turning those occasional misprints into flawless masterpieces. Let’s explore how to optimize your settings for stunning 3D prints.
Understanding Your Printer
Before diving into optimization, it’s essential to understand your printer’s capabilities. Different printers have different technologies, like FDM (Fused Deposition Modeling) or SLA (Stereolithography). Knowing your machine’s strengths and weaknesses means you can make educated adjustments that will yield better results.
1. Layer Height
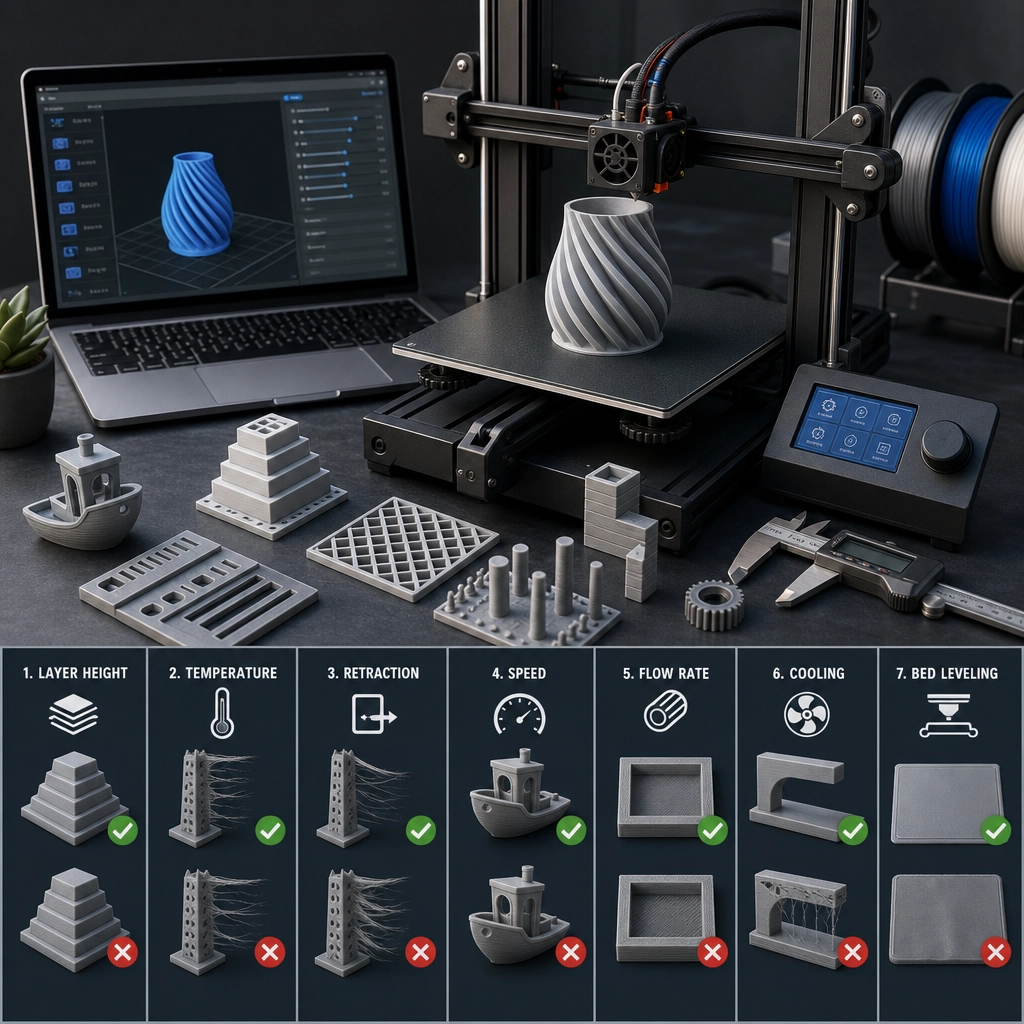
One of the pivotal settings to adjust is the layer height. The general rule of thumb is: the smaller the layer height, the finer the details and the smoother the finish. For example, if you’re printing something intricate, adjusting the layer height to 0.1mm can make a noticeable difference. However, keep in mind that smaller layers can increase print time significantly. On the flip side, if you’re printing a massive object or something that doesn’t require fine details, a layer height of 0.2mm to 0.3mm can speed things up.
2. Print Speed
Print speed is another critical setting. While it might be tempting to crank it up to finish prints faster, this can lead to poor adhesion and ruined layers. Slower speeds(around 40-60mm/s) often yield better results, especially for intricate designs. If you’re experiencing problems like stringing or blobs, it’s worth slowing down a bit.
3. Temperature Settings
Temperature plays a crucial role in how your filament adheres and flows during printing. Each type of filament has an optimal temperature range, usually specified by the manufacturer. For instance, PLA typically prints well between 190-220°C, while ABS may require higher temperatures. A good practice is to start at the lower end of the temperature range and gradually increase it if you notice issues like poor layer adhesion or under-extrusion.
4. Retraction Settings
Retraction settings are vital if you want to avoid wobbly edges or excessive stringing between print paths (those pesky little threads of filament that don’t belong). Retraction distance and speed should be adjusted according to your filament type and printer’s capabilities. A retraction distance of 1-2mm works wonders for most filaments. Experimenting with various values will help you find what works best for your setup.
5. Bed Leveling
A crucial step that many beginners overlook is bed leveling. An uneven print bed can lead to disastrous first layers which can ruin your print before it even begins! Invest some time in manual or automatic bed leveling to ensure that your print bed is perfectly flat. You can usually even manually level it by adjusting the screws beneath the bed. Homemade enthusiasts often swear by using a piece of paper to check for the right gap between the nozzle and the bed.
6. Cooling Fans
Cooling settings can also make a significant impact, especially when printing with PLA. Adequate cooling allows the filament to harden quickly, leading to sharper edges and better details. Most slicing software will give you options to control the fan speeds. Generally, it’s a good idea to run the cooling fan at 100% for the first few layers and then reduce it slightly for thicker layers.
7. Calibration Prints
Finally, don’t underestimate the power of calibration prints! Simple test prints like calibration cubes or stringing test designs can help you tweak and fine-tune your printer settings without wasting too much filament. Taking the time to run these calibration tests will save you frustrations in the long run.
3D printing is an art as much as it is science. Finding the perfect settings often involves a bit of trial and error, but with patience and practice, you’ll see improvement. Remember, the journey to perfect prints is a learning experience. By understanding your machine and the materials you’re working with, you’ll be setting yourself up for success. Happy printing!